
Make your own nail polish rack, how about it?
Nail polish racks have been trending lately. I usually don’t follow the crowd but c’mon who doesn’t need a nail polish rack? I decided to make my own because I saw an awesome tutorial on pinterest. Plus it’s cheaper than buying one and it’s super fun.
By the way, how amazing is Pinterest? You find the unimaginable there. If your ever need ideas for decorations, party/events, fashion anything you can think of pinterest has the answer.
Here’s what you will need:
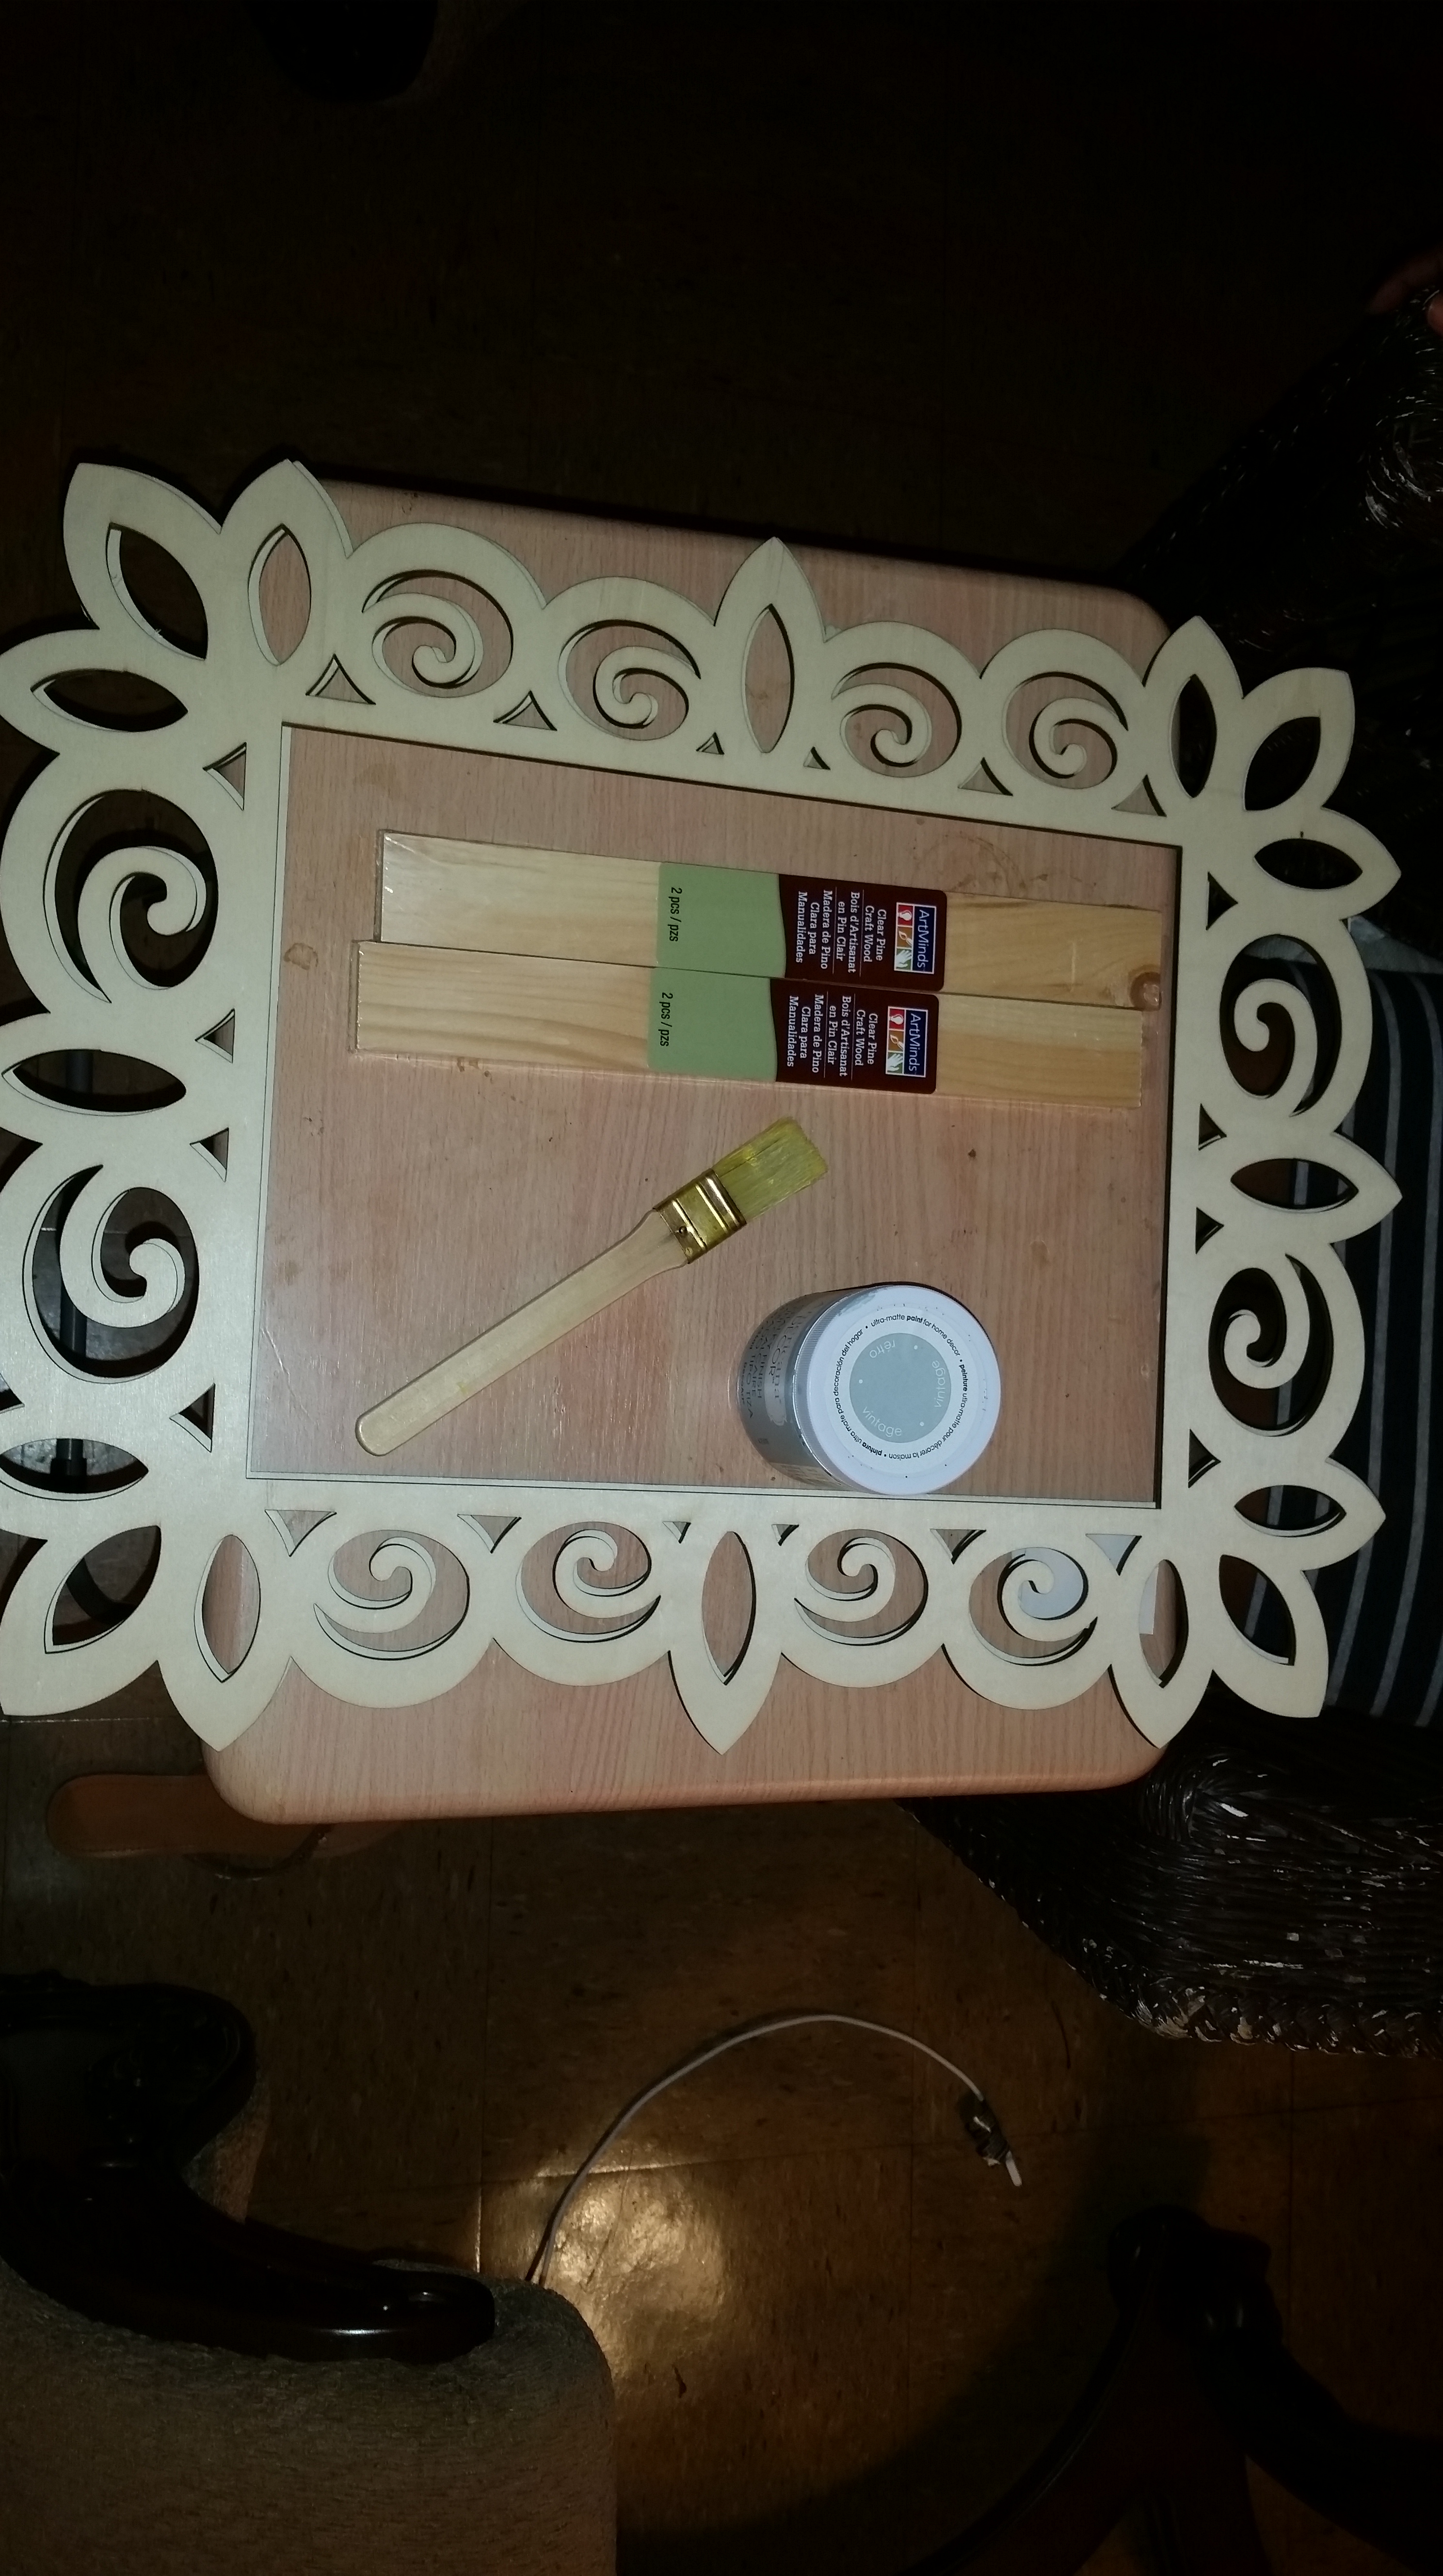

*Paint (any kind will do) and brush
*Glue gun and glue sticks
*2 Unfinished wooden laser cut Frames (size of your preference)
* 4 pieces of wood long enough to reach corner to corner on the frame
Steps:
1. This project can get a bit messy I suggest you use newspaper to cover the table or surface you are using (I wish I had followed my own advise)
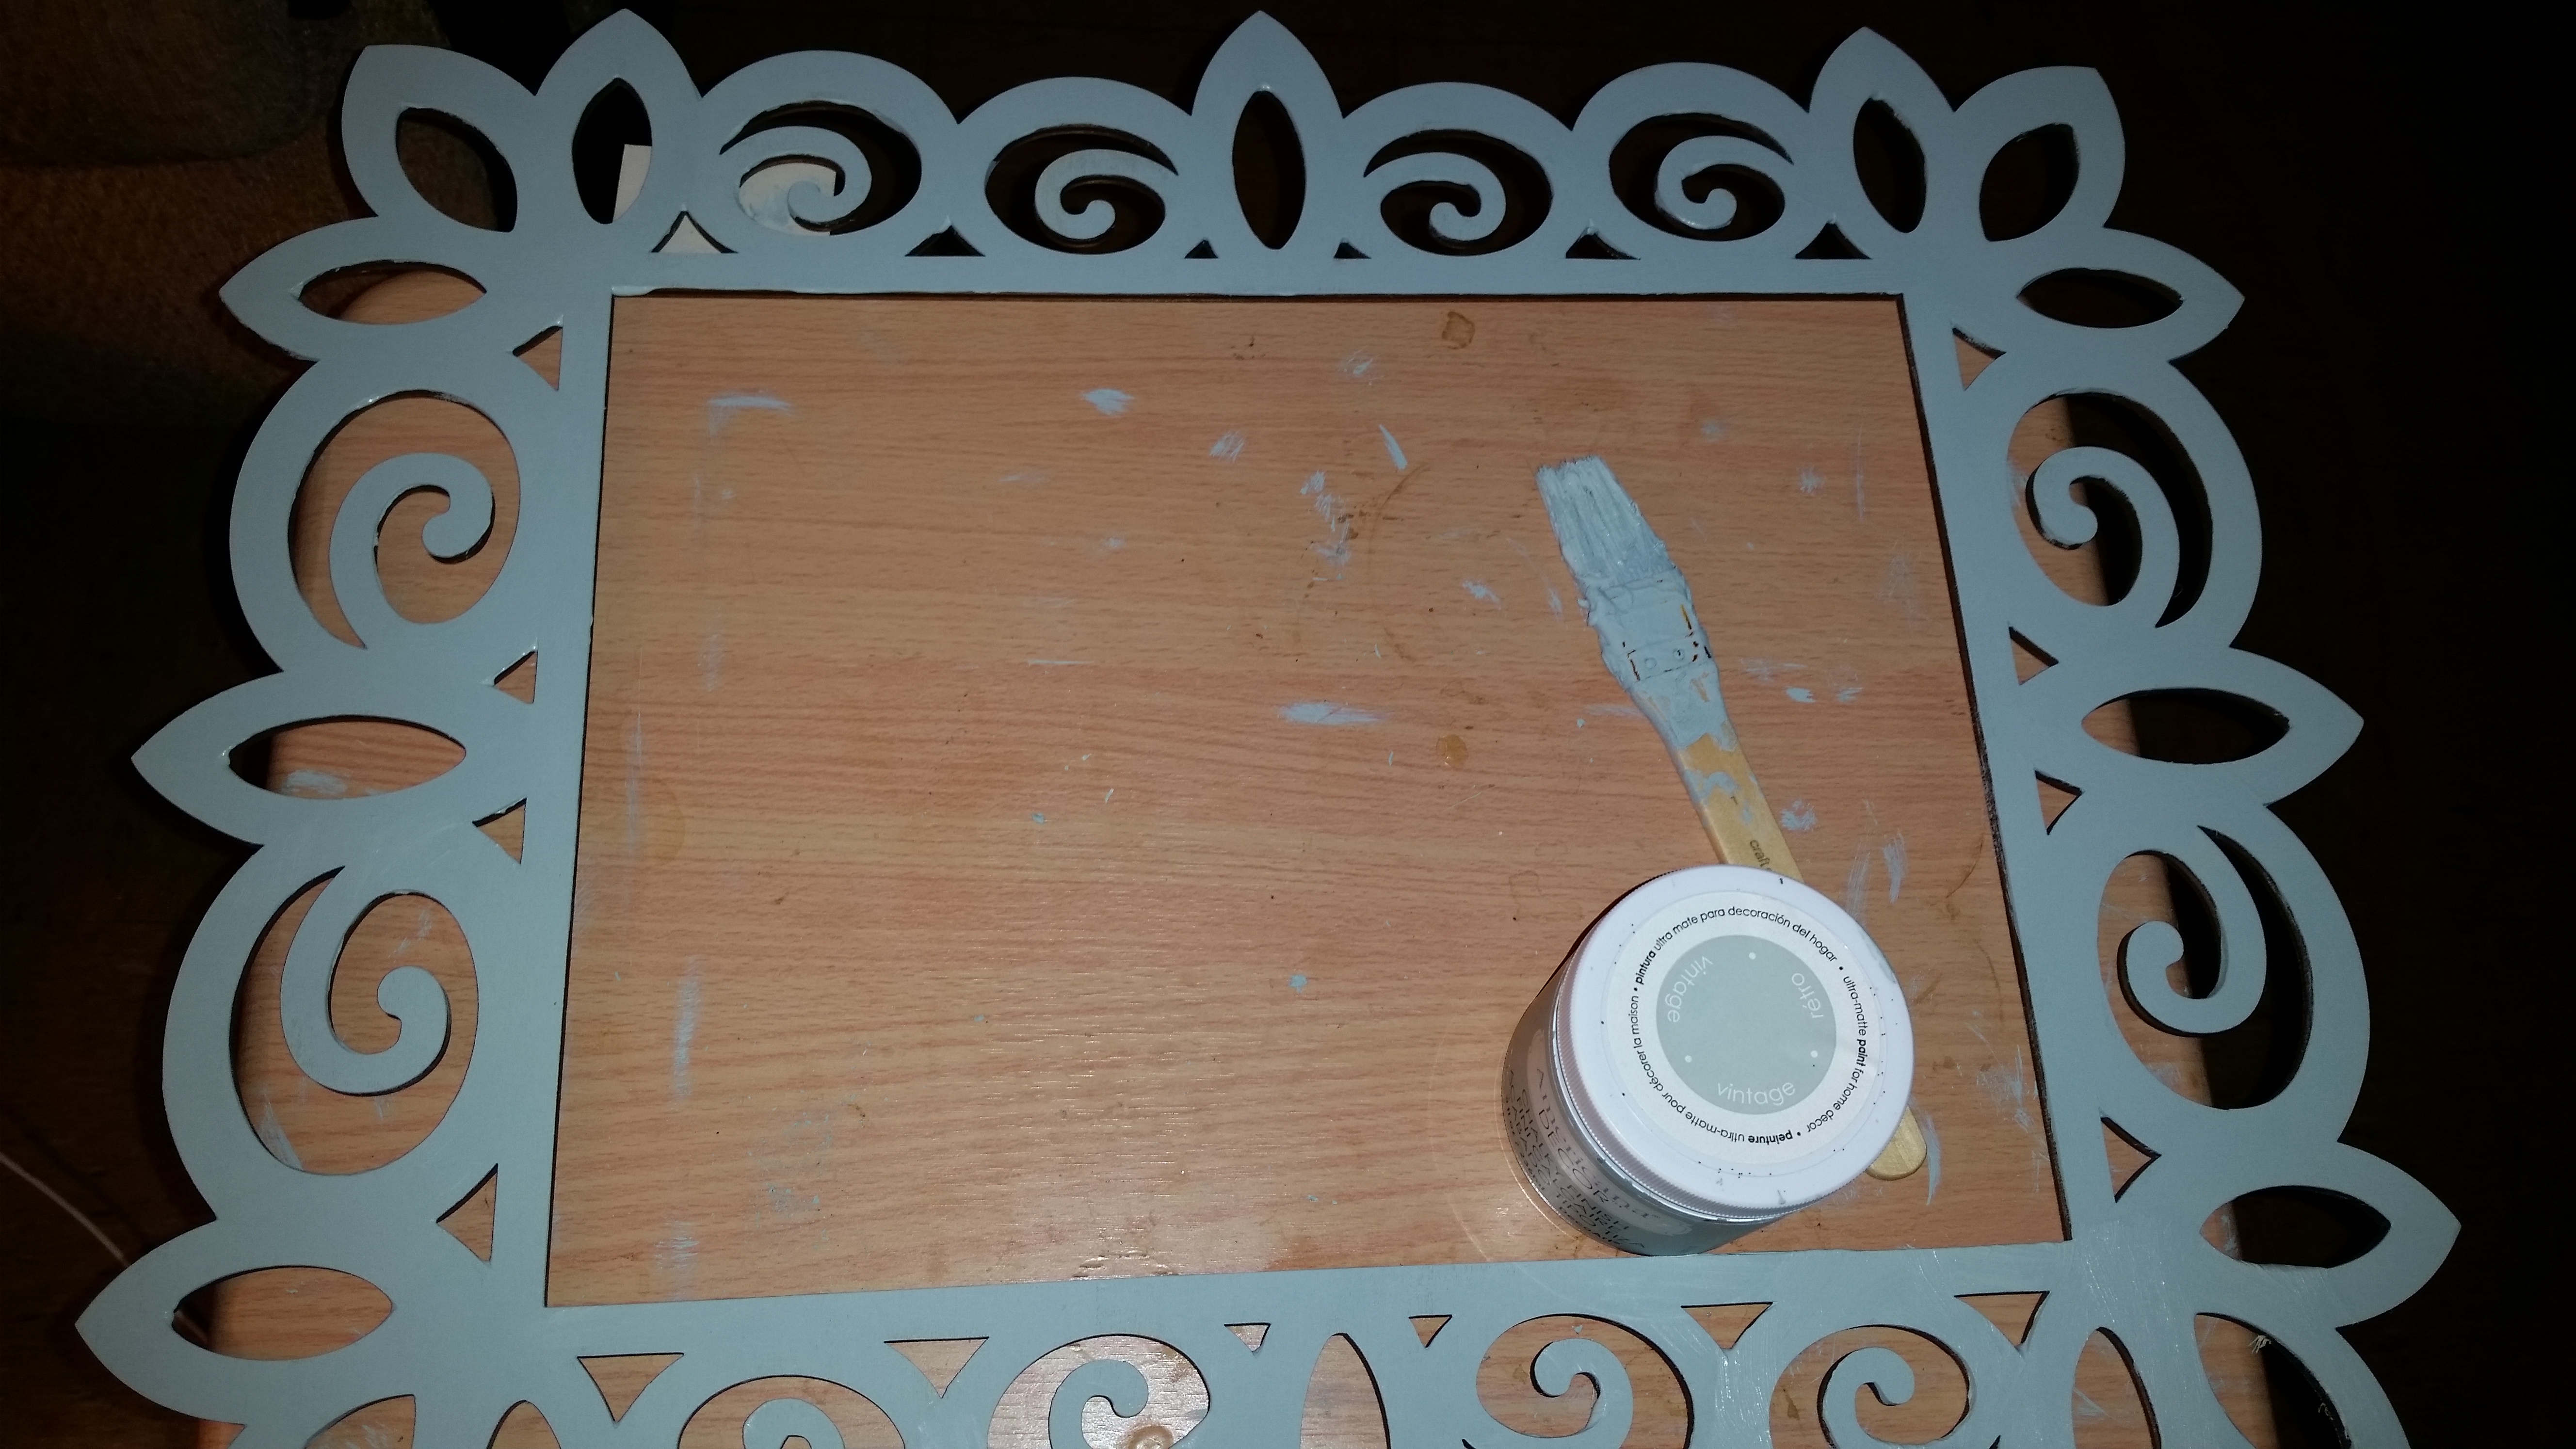
2. Paint the cleanest side of the each frame (one of the surface is usually rougher than the other)
3. Allow the frame to dry completely, you may choose to paint both sides, I only painted one side to give it more of a rustic look
4. Once the frames are completely dry flip one of the frames around so that the unfinished back is facing you
5. Quickly spread glue right on top of the frame’s opening from corner to corner

6. Press on one of the wooden panels, apply pressure for at least 30 seconds
7. Follow the steps 5 and 6 again for the bottom of the frame, right under the opening

8. Now measure how much space you want between each shelf
9. Once you have eye measured take another wooden panel and apply glue to each corner
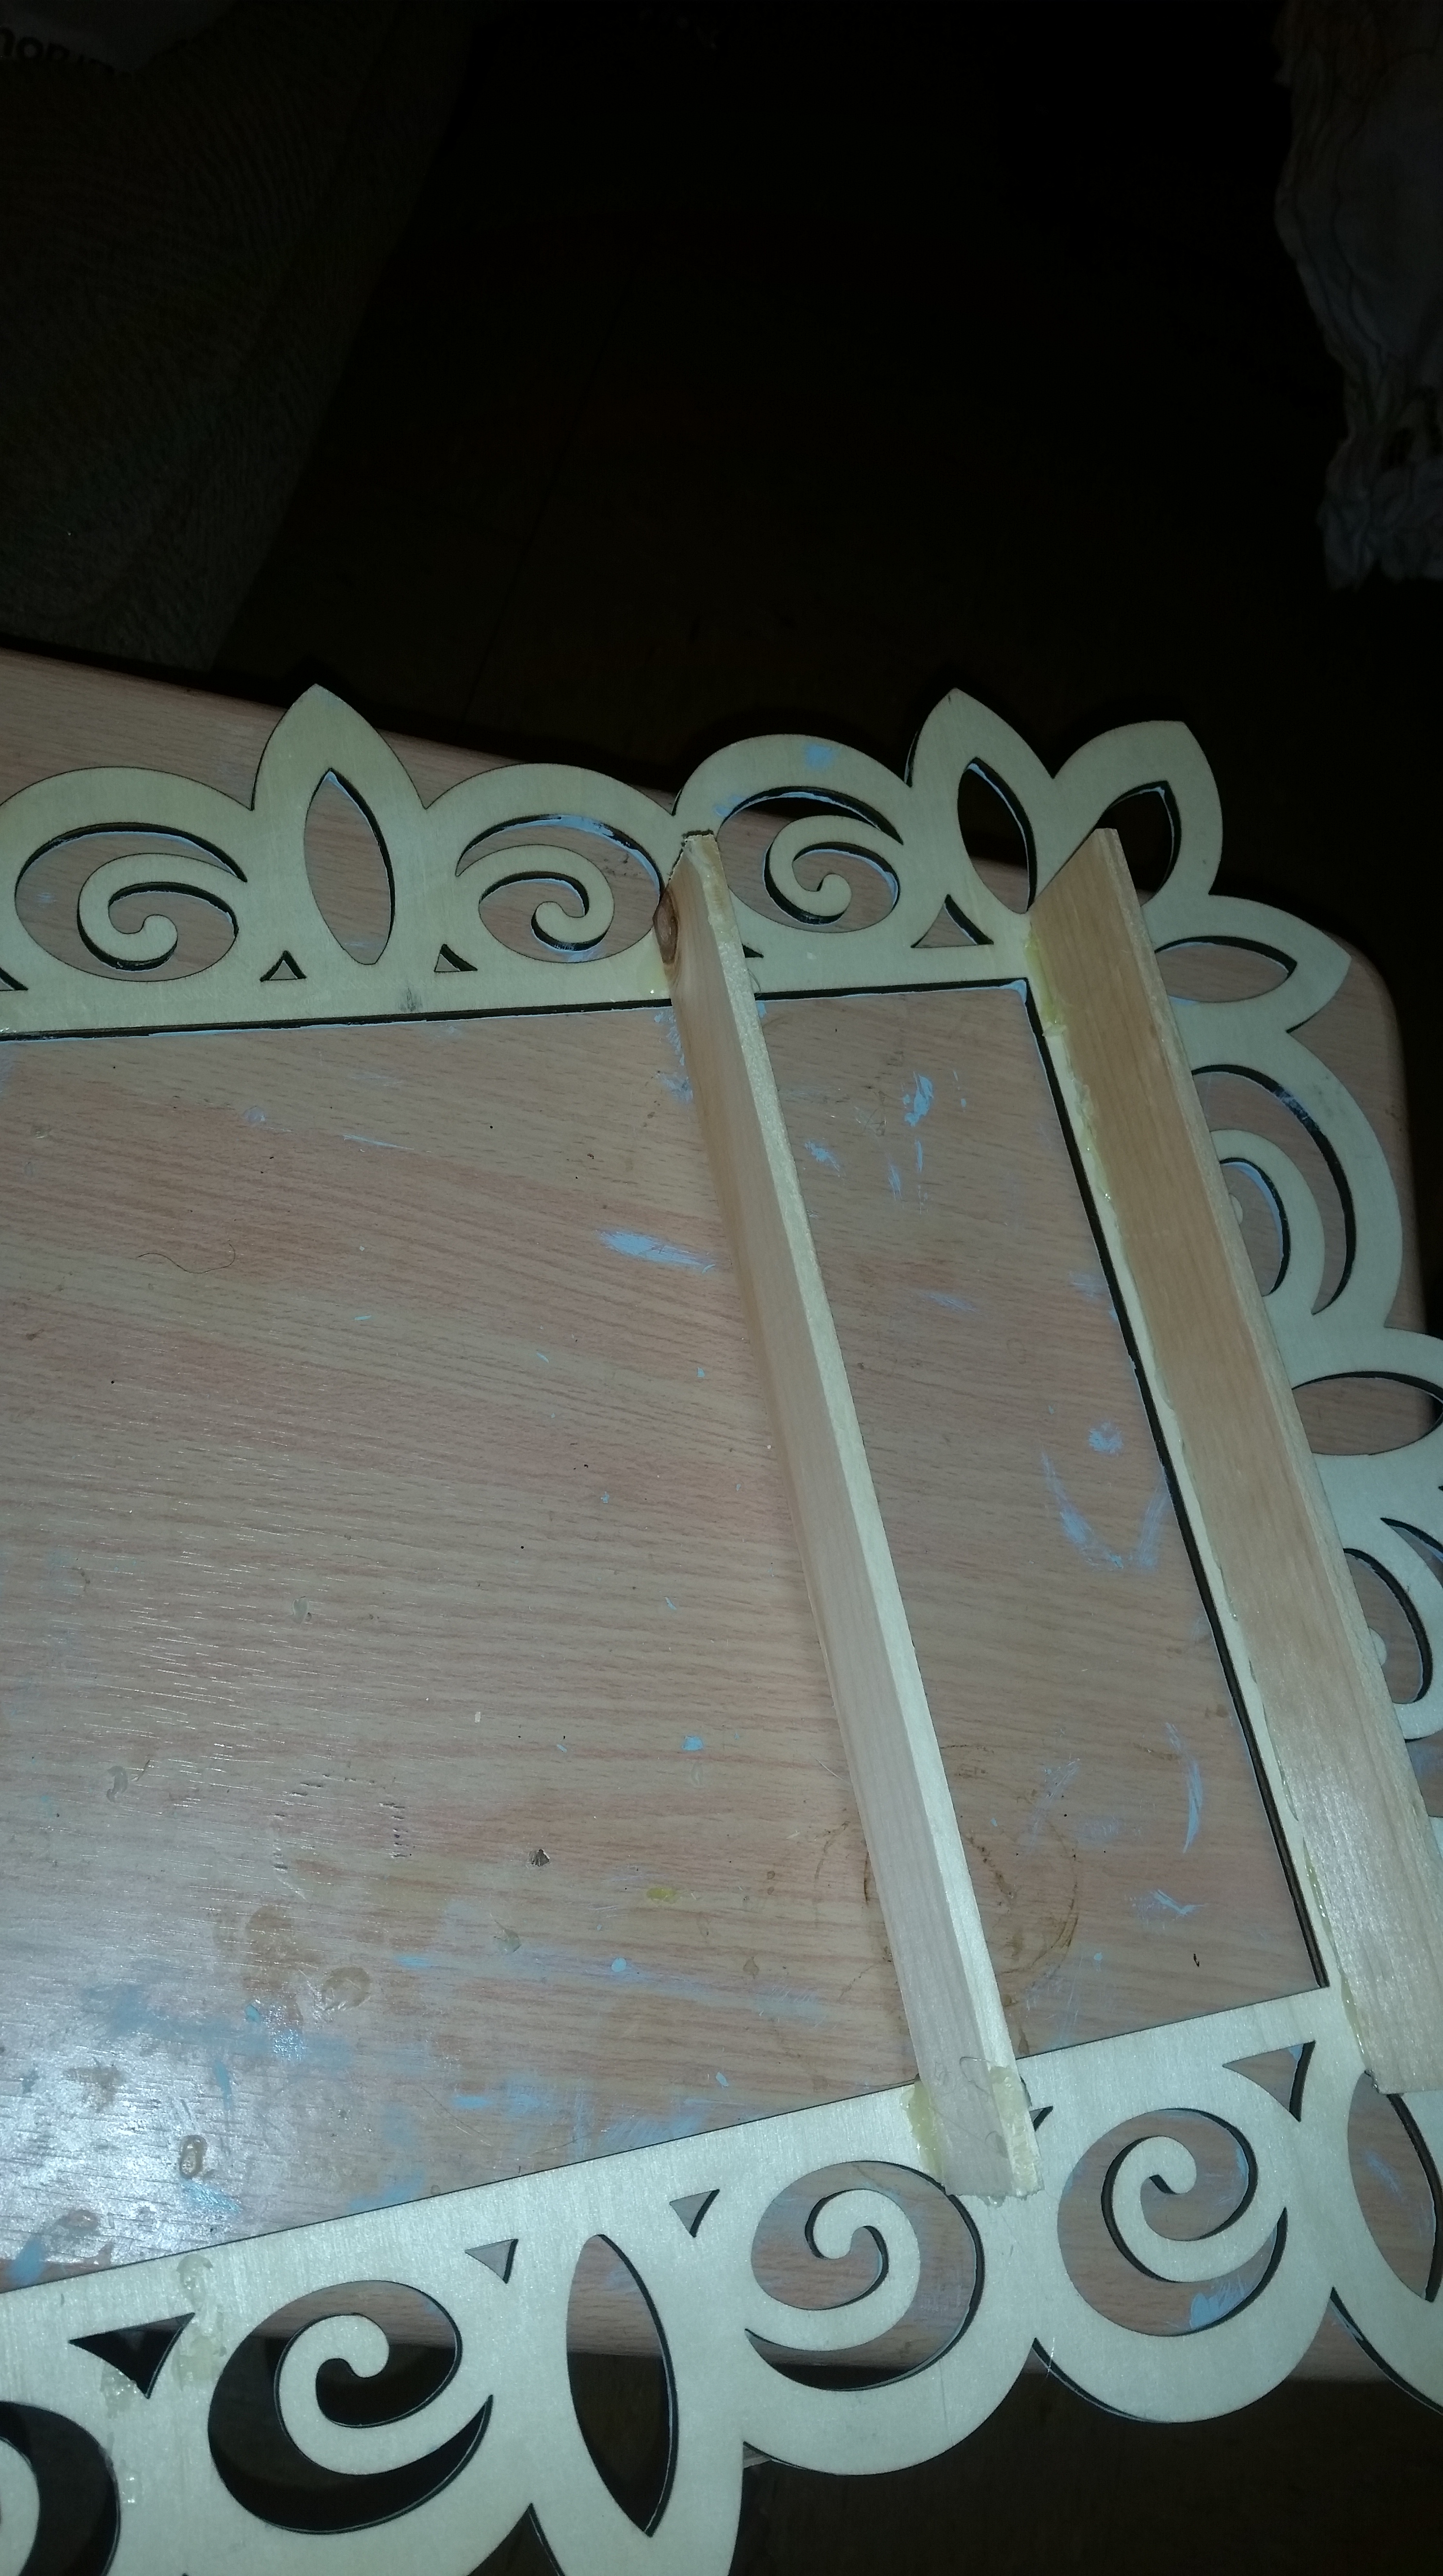
10. Press the panel unto the frame and apply pressure for at least 30 seconds
11. Follow step 8-10 to insert your final shelf

12. For this step you must work quickly because the glue dries fast, apply glue across the entire top and bottom panel and on the 4 corners of the shelves (panels)

13. Apply pressure for 30 seconds
14. Make sure everything is secure

Done!!!
Isn’t it fabulous?
Leave your comments below and let me know if you enjoyed this tutorial or share pictures of your finished product…

“You can’t use up creativity. The more you use, the more you have.” – Maya Angelou
Have a spectucular weekend
~BESOS ❤
